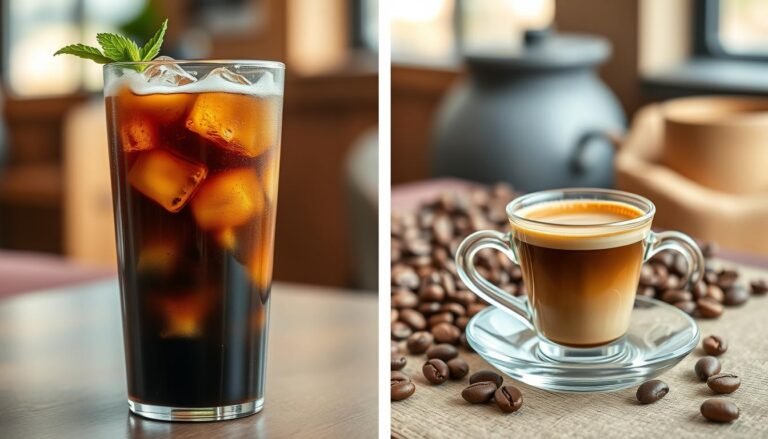
Cold Brew Coffee vs Iced Latte
We introduce two popular summer beverages and set clear expectations for how each is made and when each shines. One is steeped for hours using cold extraction or gravity drip to yield a smooth, low-acid concentrate that stores well. The other is an espresso-based drink poured over ice and topped with chilled milk for a creamy, fresh texture.
In this guide we preview the key comparison points: brewing methods, flavor and texture, caffeine and calories, and convenience. We explain common recipes—like a simple 200g to 1L ratio for long immersion, or a one- to two-shot espresso pulled into milk—and note that perceived caffeine varies by ratio and shot count.
We also highlight customization: different beans, milks, and sweeteners let you tailor taste and nutrition. Use this introduction to decide quickly between a ready-to-pour batch and a freshly pulled espresso option that best fits your routine.
What We Mean by Cold Brew, Iced Coffee, and Iced Latte
Before we compare flavor and prep, we clarify labels so you know what to order or make at home. Names often overlap, so understanding the production process helps set taste expectations.
Long, cold-water extraction
Cold brew is a no-heat method that relies on long immersion or slow drip. Grounds steep for 12–24 hours or receive iced water drop by drop for a clear concentrate.
This process pulls different compounds than hot methods, which most people perceive as less acidic and smoother when served black.
Espresso plus milk and ice
An iced latte is simply espresso shots topped with cold milk and ice. Cafés often use roughly one part espresso to two parts milk for a creamy, milk-forward profile.
A broad umbrella: iced coffee
Iced coffee can mean cold brew concentrate poured over ice or espresso-based drinks chilled with milk and syrup. Menu labels like iced americano or iced flat white all live under this category.
- Core difference: hours-long extraction versus seconds-long, high-pressure extraction.
- Expectation: smoother, lower-acid black options versus richer, milk-balanced drinks.
Brewing Methods That Define the Difference
Different extraction techniques shape flavor and texture. We explain the main approaches, the gear you need, and practical timings so you can choose what fits your routine.

Immersion steeping
Combine coarse ground coffee with water and let it steep for 12–24 hours. A common starter ratio is 200g per 1 liter and a 12–16 hours steep before filtering and diluting to taste.
Cold drip (Dutch/Kyoto)
Cold water drips slowly through grounds by gravity. This produces a clear, aromatic concentrate in about 3.5 hours and highlights subtle notes without heat.
Espresso-based prep
For iced lattes, pull shots with an espresso machine or moka pot, add cold milk, then pour over fresh ice. Fine grind and high pressure give quick extraction and bold flavor.
- Grind: coarse for long steeping; fine for pressure extraction.
- Gear: French press or dedicated brewers for batch steeping; a machine for single-serve shots.
- Time: hours of diffusion versus seconds of pressure define clarity, strength, and mouthfeel.
Cold Brew Coffee vs Iced Latte: Flavor, Texture, and Acidity
We compare how each method shapes flavor, from mellow sweetness to bold espresso notes.
Taste profile
Long, cool extraction often yields a smooth, naturally sweet profile with muted acidity. Many roasters note floral brightness can be softened, leaving chocolatey and nutty tones.
By contrast, espresso brings roasty intensity and vivid aromatics. When combined with milk, that intensity becomes a softer, milk-forward comfort that highlights dairy sweetness.
Texture and mouthfeel
Over ice, a light, clean body makes the concentrate feel brisk and refreshing. Dilution or a single-serve pour changes mouthfeel and perceived sweetness.
Milk adds viscosity and creaminess. Higher milk content gives a richer, fuller finish that many of us find satisfying on warm days.
Acidity and sensitivity
- Perceived acidity: cool extraction is often described as less acidic, which can be gentler on the stomach.
- Clarity: extraction method shifts which flavor notes dominate — mellow and rounded versus sharp and aromatic.
- Customization: bean choice, roast, and milk type further tune taste and texture for each drink.
Caffeine Content and Nutrition at a Glance
Understanding caffeine and basic nutrition helps us pick the right cup for the day. We compare typical numbers so you can decide whether you want more kick or a lighter, milk-forward option.

Caffeine dynamics
One espresso shot averages about 63 mg of caffeine; two shots give roughly 126 mg. Long-steep concentrates often fall between 100–200 mg per 8 oz serving, depending on ratio and dilution.
That means a strong batch can outpace a single-shot milk drink, while a double shot in a larger cup can match or exceed concentrate levels. Choose decaf or dilute the concentrate to lower the content.
Calories, sugar, and milk choices
Black concentrate is virtually calorie-free. Adding milk turns the drink into a higher-calorie beverage. Dairy supplies protein and calcium; plant milks vary widely by brand and whether they are sweetened.
- Syrups and pumps add sugar and calories fast—mindful add-ins matter.
- Shot count and cup size determine final caffeine and strength.
- For lighter sugar, pick unsweetened plant milk or skip syrups.
Time, Convenience, and Storage: Planning Your Brew
Choosing a schedule for brewing affects freshness, flavor, and how much prep we do each week. Some methods ask for long, hands-off hours while others deliver a made-to-order cup in seconds.
Hands-off hours versus quick prep
A long steep yields a ready-to-pour cold brew that we can refrigerate for days. Set it up once, and you gain easy access to chilled coffee all week.
Espresso-based drinks are fast to make. Pull shots, add milk and ice, and serve. Those milk-forward drinks do not store well; texture and flavor degrade if held.
Batching, shelf life, and service
- Batching saves morning time and reduces waste—store in an airtight container for up to a week with minimal loss of content.
- Cold drip shortens steep time but still benefits from fresh service over ice.
- Always mix milk-based drinks just before drinking and add fresh ice to protect texture and prevent excess dilution.
| Plan | Setup time | Storage |
|---|---|---|
| Batch brew | Hours (hands-off) | Up to 7 days sealed |
| Single-serve | Minutes | Best fresh—do not store |
If you want grab-and-go, choose batch cold brew. If you want a café-style experience, make fresh iced lattes at the moment of service.
How to Make Each at Home (Pro Tips for Better Results)
Let’s break down clear, repeatable steps for batch and single-serve preparation at home. We give exact ratios, timing, and simple fixes so your next cup hits the mark.

Batch concentrate (reliable recipe)
Use 200g coarse ground coffee with 1 liter cold water and steep 12–16 hours. Strain through a fine mesh or French press, then taste and dilute to preference.
Store the concentrate sealed in the fridge for up to seven days. If it tastes harsh, shorten steep time or use slightly coarser ground.
Single-serve espresso pour
Pull one or two espresso shots with an espresso machine or moka pot. Add cold milk to taste and pour over fresh ice for a creamy finish.
Choose dairy or plant milk based on calories and mouthfeel. Serve immediately to preserve texture and aroma.
Ice strategy and gear basics
- Use regular ice for quick chilling; use coffee ice cubes to avoid dilution as the drink melts.
- Essential gear: grinder, French press or jar for batch brewing, and a machine or moka pot for espresso shots.
- Troubleshooting: if brew is weak, increase grounds or steep longer; if bitter, coarsen grind or shorten steeping hours.
| Recipe | Ratio | Time |
|---|---|---|
| Batch concentrate | 200g : 1 L water | 12–16 hours |
| Espresso pour | 1–2 shots per cup | Immediate service |
| Ice upgrade | Coffee ice cubes | Pre-freeze |
Beans, Roast Profiles, and Customization Options
A coffee’s origin and roast set the stage; our brewing choices only reveal what’s already in the bean. We pick beans and roast to match the drink we want—smooth and chocolatey for long steeping, or bright and punchy for espresso-based pours.
Selecting beans and roast
For a round, low-acid batch, medium-dark roasts often give chocolate and caramel notes that sit well when chilled. Lighter roasts keep floral acidity but may taste muted with long, cool extraction.
Dialing in espresso for milk-forward pours
Blends made for espresso deliver consistent body and crema in a shot. Adjust shot count to control strength and aroma. Try a Robusta-forward blend for extra body or high-altitude Arabica for clarity.
- Keep ground coffee fresh; store beans airtight and grind just before use.
- Tweak sweetness with simple syrup or vanilla to enhance, not mask, bean taste.
- Milk choice—whole, oat, or almond—changes texture and perceived sweetness.
| Bean Type | Roast | Best For | Flavor Notes |
|---|---|---|---|
| High-altitude Arabica | Light–Medium | Bright single-serve pours | Citrus, floral, complex |
| Medium-dark blend | Medium-dark | Batch cold brew and creamy lattes | Chocolate, caramel, low acid |
| Robusta-forward blend | Dark | Bold espresso shots | Heavy body, nutty, earthy |
Find Your Best Summer Sip
Pick the drink that matches your morning rhythm and taste goals. If you want a smooth, lower-acid option you can store for days, batch a cold brew and keep it chilled.
If you prefer creamy texture and on-demand espresso character, pull shots and build an iced latte fresh with cold milk and ice. That method gives shot-by-shot control of strength and flavor.
For caffeine, a batch concentrate often lands higher per serving, while one to two espresso shots let us fine-tune kick. Use coffee ice cubes to curb dilution and preserve taste as drinks melt.
Choose medium-dark beans for roundness in batch brews and espresso-focused blends for stable lattes. Test one variable at a time—beans, ratios, or preparation—to dial in your signature summer drink.