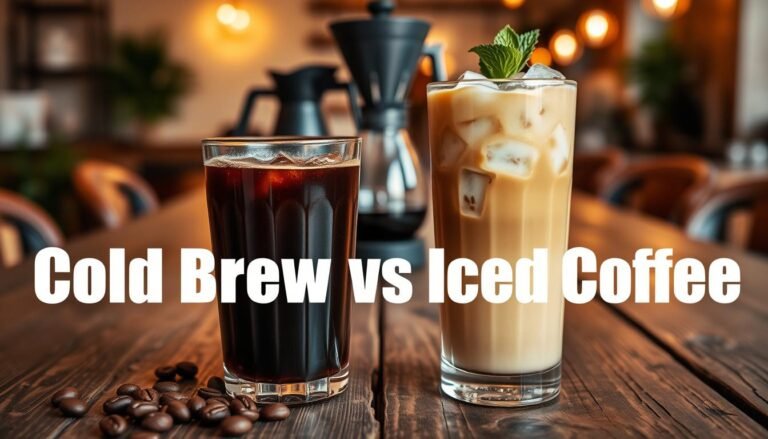
Cold Brew vs Nitro Coffee
We set the stage with a practical comparison of two popular cold coffee styles and why the difference matters for taste and mouthfeel.
Both drinks start with grounds and water, but the process splits quickly. One relies on a long, cool steep that yields a milder, sweeter concentrate. The other layers a nitrogen infusion to create a creamy, draught-like texture and foamy head.
In this short guide we’ll cover brewing methods, texture and flavor differences, caffeine expectations, and the best way to enjoy each drink at home or on tap. We also clarify where iced coffee fits in, since it is brewed hot then chilled and can taste brighter or more acidic.
By the end you’ll order faster from a menu, pick the right gear, and plan a week of cold drinks with confidence.
What we mean by cold coffee today
When someone asks for a chilled cup, they might mean three different things—each made with its own process and serving style.
First, iced drinks start with hot water and a fast brew, then cool quickly; methods like the Japanese pour-over brew directly over ice to lock in bright notes. This option is fast and often more acidic than slow methods.
Iced, slow-steep, and nitrogen-poured options
Slow-steep concentrate soaks coarse grounds in room-temperature water for 12–24 hours. The result is a sweeter, less acidic base that is usually diluted with water or milk.
Nitrogen-infused servings start with the same concentrate but add nitrogen for a draught-like pour and a creamy texture. They are usually served without ice to protect the foamy head.
| Style | Method | Serve |
|---|---|---|
| Iced | Hot brew then cool | Over ice |
| Regular cold brew | Long steep (12–24 hours) | Dilute with water or milk |
| Nitro cold brew | Concentrate + nitrogen on tap | Usually without ice |
On a menu, wording matters: order iced for speed, regular cold brew for smoothness, or nitro cold if you want a creamy, theatrical pour. Note that concentrates can raise caffeine per ounce before dilution; we’ll unpack that next.
Cold Brew vs Nitro Coffee: the key differences at a glance
We map the sensory gaps between a slow-steep concentrate and its nitrogen-touched counterpart to help you choose by feel and look. Below we focus on texture, perceived sweetness, and the theatrical pour that defines nitro service.
Texture and mouthfeel
Regular cold brew yields a smooth, low-acid body from long steeping in room-temperature water. The result is easy on the palate and often seems sweeter without added sugar.
Nitro deliveries add tiny nitrogen bubbles that transform that same base into a creamy texture and velvety mouthfeel. The gas changes how the drink coats the tongue more than it alters flavors.
Flavor and sweetness perception
The slow extraction softens bitterness and brings forward chocolatey or nutty notes. Dilution with water or milk shifts strength and perceived sweetness.
Nitro offers a lifted sweetness and slight acidity perception because aeration loosens the body. Remember: the nitrogen adds texture, not caffeine.
Presentation and the cascade effect
Nitro pours from a tap and produces a cascade of microbubbles that settle into a tight, foamy head like a draught beer. This visual drama is often why people order nitro cold rather than a clear, iced glass.
- Choose regular cold brew for a clear, smooth cup over ice.
- Choose nitro for a creamy, opaque pour with a persistent head and rounded feel.
- Caffeine can feel higher in nitro at cafes due to concentrate choices, though the infusion itself does not raise caffeine.
| Feature | Regular cold brew | Nitro cold |
|---|---|---|
| Texture | Smooth, light body | Velvety, creamy texture |
| Visual | Clear, often served over ice | Opaque, cascading pour with foamy head |
| Flavor perception | Sweeter, low acidity | Lifted sweetness, slight brightness |
| Typical serve | Diluted with water or milk | Usually served without ice from tap |
In short, the difference is mostly experiential: one favors clarity and simple sweet notes, the other delivers a plush mouthfeel and a show-stopping pour.
How cold brew is made and why it tastes smoother
We walk through the step-by-step method that turns coarse grounds and cold water into a mellow, low-acid concentrate.
Steep, strain, and decide strength
Start by mixing coarse ground coffee with room-temperature or cold water. Let the mix sit for 12–24 hours; longer time pulls more soluble flavors without using hot water.
Concentrate versus ready-to-drink
A higher grounds-to-water ratio yields a concentrate meant to be diluted. We add water, ice, or milk to taste for a ready-to-drink cup.
- Process: stir coarse grounds, steep 12–24 hours, then filter.
- Filtration choices (mesh, cloth, or paper) affect clarity and mouthfeel.
- Grind size and ratio control bitterness, strength, and caffeine per ounce.
| Type | Ratio | Serve |
|---|---|---|
| Concentrate | Higher grounds : water | Dilute with water, ice, or milk |
| Ready-to-drink | Lower grounds : water | Serve over ice or straight |
Because extraction happens at low temperature, the brew pulls fewer bright acids and bitter oils. The result is a smooth texture and sweeter perceived flavors.
Small tweaks—like adding a cinnamon stick during steeping—can enhance flavors without extra sugar. And while nitro offers a showy pour, it always starts with this same made steeping base.
What makes nitro cold brew different beyond the brew
The leap from concentrate to that silky, cascading pour happens in the keg and at the tap. We focus on the technical steps that turn a mellow concentrate into a velvety, draught-style drink.
From concentrate to keg and pressurized service
First, we transfer the concentrate into a keg and seal it. Then operators pressurize the vessel with nitrogen gas to set infusion and storage pressure.
Pressure and flow control at the tap are vital. They keep the pour steady and preserve the signature texture.

Tiny nitrogen bubbles, foam, and the cascade
As the drink flows, dissolved nitrogen flashes into tiny nitrogen bubbles. That creates the cascade and a tight foamy head like a draught beer.
Because the gas is nitrogen, not CO2, the pour feels creamy rather than fizzy. The result is dense mouthfeel without prickly carbonation.
Cans, portability, and quality cues
Canned versions hold nitrogen under pressure so the texture travels well. A good can reproduces a version of the tap cascade at home.
| Format | Benefit | Quality cue |
|---|---|---|
| On tap | Peak texture and show | Tight head, cascade |
| Can | Portable, consistent | Stable nitrogenation |
| Keg storage | Controlled pressure | Even mouthfeel |
Remember: the nitrogen infusion does not change caffeine levels. Texture and theater are the upgrade, and milk often becomes optional due to the creamy gas-driven body.
Caffeine, acidity, and comfort: separating myths from reality
Here we untangle caffeine claims and digestion concerns so you can pick the right chilled drink for your routine.
Does nitro raise caffeine levels?
Nitrogen does not add caffeine. The gas only changes mouthfeel and the pour. Higher measured caffeine in some nitro servings comes from stronger recipes or less dilution.
For example, a 12‑ounce regular cold brew coffee might test near 155 mg, while a 12‑ounce nitro sample can read around 215 mg at some shops. That difference reflects concentration choices, not the infusion.
Why slow-steeped drinks feel gentler
Low-temperature brewing pulls fewer bright acids and bitter oils. The result is a smoother taste and a cup that many people find easier on the stomach.
- Concentrates pack more caffeine per ounce, but dilution with water or milk reduces that per‑cup total.
- Smoother mouthfeel can cut the urge to add sugar or milk.
- Pick strength and serving time to match your caffeine sensitivity and routine.
| Factor | What affects it | Practical note |
|---|---|---|
| Caffeine | Recipe strength, dilution | Adjust with water or milk |
| Acidity | Temperature and time | Cold extraction is gentler |
| Mouthfeel | Gas and serving method | Nitro adds creaminess, not stimulant |
Serving, add-ins, and best ways to drink each
The right serve and mix-ins let us tailor strength, mouthfeel, and perceived sweetness. Below we give clear, practical tips for two popular chilled styles so you can get the most from your cup.

Cold brew: balance the concentrate
Treat a concentrate as a base. Add water for clarity, ice to chill and dilute slowly, or milk for a richer finish.
Try a 1:1 ratio of concentrate to water over ice to start. Adjust to taste to control strength and caffeine.
Nitro cold: let the pour shine
We recommend serving nitro straight from the tap without ice to keep the cascade and creamy texture intact.
Avoid stirring aggressively so the foamy head stays; nitrogen gives extra body and perceived sweetness, so sugar or dairy are often unnecessary.
- Use chilled glassware for nitro and tall, ice-filled glasses for regular cold brew.
- Filter concentrates well at home to remove grounds before adding mix-ins.
- Mind serving size and time of day to manage caffeine intake.
| Note | Best tip | Result |
|---|---|---|
| Concentrate | 1:1 start ratio | Balanced strength |
| Nitrogen tap | Serve without ice | Stable mouthfeel |
| Add-ins | Light syrups or spices | Preserved flavors |
Iced coffee vs cold brew vs nitro: the process and taste differences
Let’s line up iced, slow-steep, and tap-infused service to show how each process changes the cup.
Iced coffee starts with hot water, a fast extraction, then rapid cooling or pouring directly over ice. That quick thermal change preserves bright bean flavors and higher acidity. It’s a good pick when we want clarity and a lively finish.
Slow-steep takes 12–24 hours in room-temperature or cold water. The long time reduces acidity and yields a sweeter, gentler profile. We dilute a concentrate for drinking strength, so strength and caffeine depend on the mix.
Nitro begins with that same slow-steep base but adds nitrogen at the keg or in a can. The nitrogen creates tiny bubbles, a beer-like cascade, and a tight foamy head. The texture feels rich and creamy even without milk.
- Iced coffee: fast, bright, served over ice.
- Regular cold brew: long steep, mellow, often diluted.
- Nitro cold: nitrogen infusion, cascading pour, creamy mouthfeel.
| Method | Process | Typical taste |
|---|---|---|
| Iced coffee | Hot water brew, then cool | Bright, higher acidity |
| Regular cold brew | 12–24 hours steep in cold water | Smoother, slightly sweeter |
| Nitro cold | Concentrate + nitrogen on tap or can | Creamy, rounded finish with head |
In practice, choose iced coffee for quick refreshment and clarity, pick regular cold brew for relaxed sipping, and order nitro cold when we want the theatrical tap experience. Caffeine levels depend more on recipe and dilution than on the nitrogen itself.
Home and cafe setups: gear, time, and practicality
Choosing the right gear and schedule makes a big difference in flavor, time, and consistency.
Brewing at home with simple tools
We can start with a jar, coarse grounds, and fresh water. Mix, cover, and let the mix steep for 8–24 hours based on taste.
After steeping, strain through a fine mesh or paper filter to reduce sediment. Store the concentrate sealed in the fridge and use within about a week for best flavor.

Nitro at home: kegs, nitrogen, and when it’s worth it
Setting up nitro at home needs a small keg, nitrogen source, and a compatible tap head. That gear creates the cascading pour and creamy head.
This investment pays off for daily nitro drinkers or shared office use. Occasional drinkers may prefer canned nitro cold brew from a trusted brand.
Shelf life, storage, and planning a week of cold drinks
Batch brewing on weekends saves time. Keep sealed concentrate in glass jars and label the date.
Freeze large ice cubes to slow dilution for regular serves. Avoid adding ice to nitro pours so the head and texture stay intact.
| Setup | Best for | Notes |
|---|---|---|
| Home jar | Occasional drinkers | Cheap, simple, 8–24 hours steep |
| Small keg + nitrogen | Daily nitro fans | Higher cost, tap-like pour |
| Cans | On-the-go | Portable nitro texture, consistent |
Choosing your perfect cold coffee for the season ahead
We’ll help you pick the right chilled option so your weekly routine matches taste, time, and caffeine goals.
Choose regular cold brew if you want a versatile, low‑acid base you can dilute with water or milk and store for days. Pick nitro when you crave a creamy, cascading pour from a keg or can that highlights nitrogen texture.
Match serving to schedule: busy mornings favor a ready-to-drink concentrate; relaxed breaks suit a straight nitro pour. Also consider caffeine timing—dilute to lower strength or sip small, straight servings to limit intake.
Keep it sustainable: batch brew once, refrigerate, and reuse. Both styles start from the same steeped base, so pick the way that fits your gear, taste, and season—and change it when you want that draft-like cascade or a smooth, flexible cup.